First things first, I’m writing this post as part of the Biannual Blogathon Bash. Anyone is welcome to use this information and really hope everyone can learn something from this tutorial, but only those who have signed up for the Blogathon, are eligible to win awesome prizes. If you’re interested in learning more about the Blogathon feel free to check it out here –>
Now, let’s get to it. There are are so many different photo editing options out there and each has similar yet different features. I’ve used most of them at one time or another, but the one that I use most by far is PicMonkey. Now I pay for the upgraded “Royale” version because I use it pretty much every day, but you can totally get by with just the free version if you want. (I actually used only the free version for about my first year and 1/2 of blogging because I wasn’t exactly raking in the cash.) For the purpose of this turtorial though, I’m going to assume we’re all broke college students and just want to use the free version to turn our gorgeous images into truly pinnable works of art.
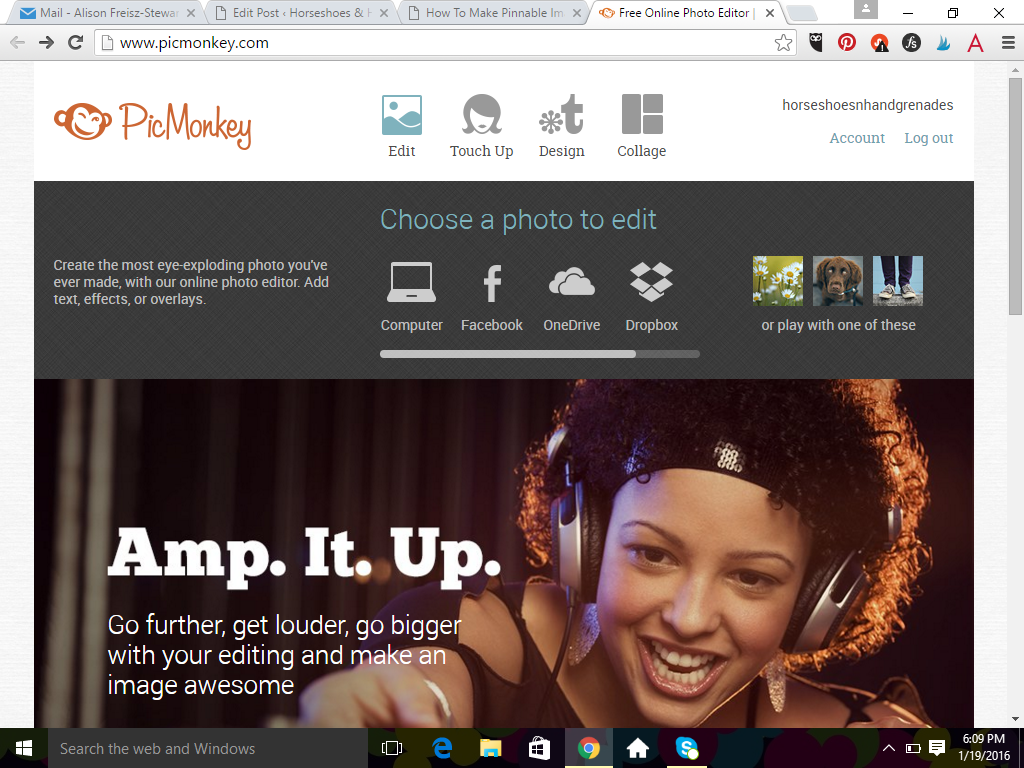
- The first thing you’ll do is choose what photo you want to use and click “edit” to upload into PicMonkey.
You can upload from your computer, Facebook, flikr, OneDrive or Dropbox depending on where you store photos, you should be able to access them fairly easily. I just went with one of the PicMonkey stock photos for now.
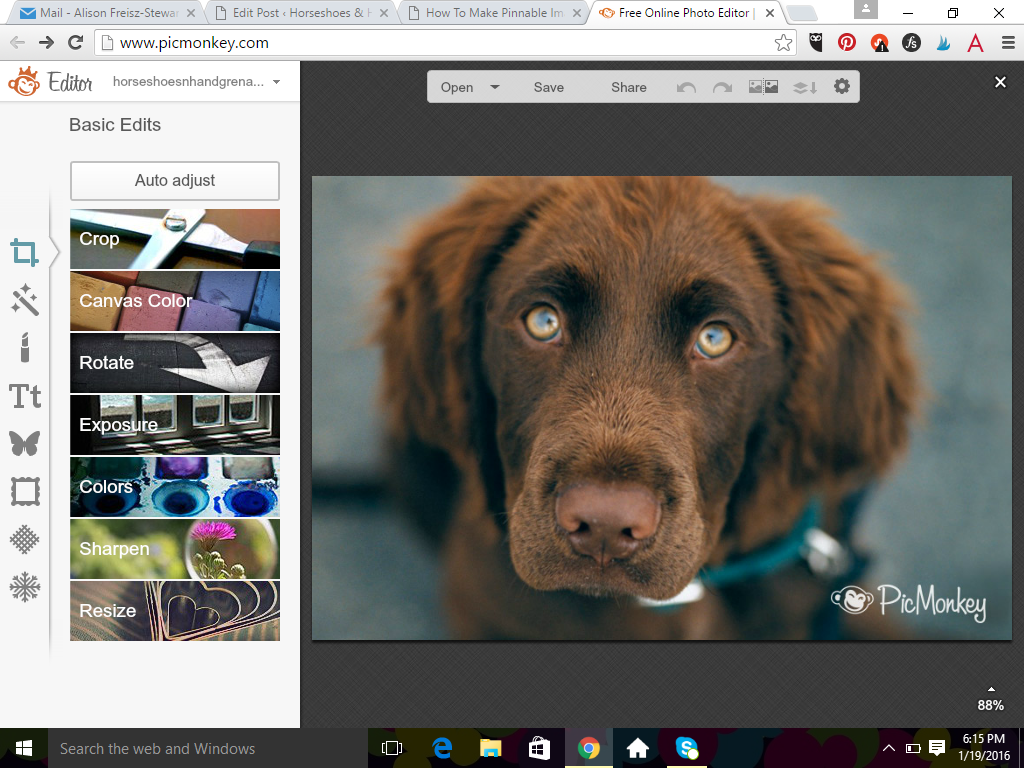
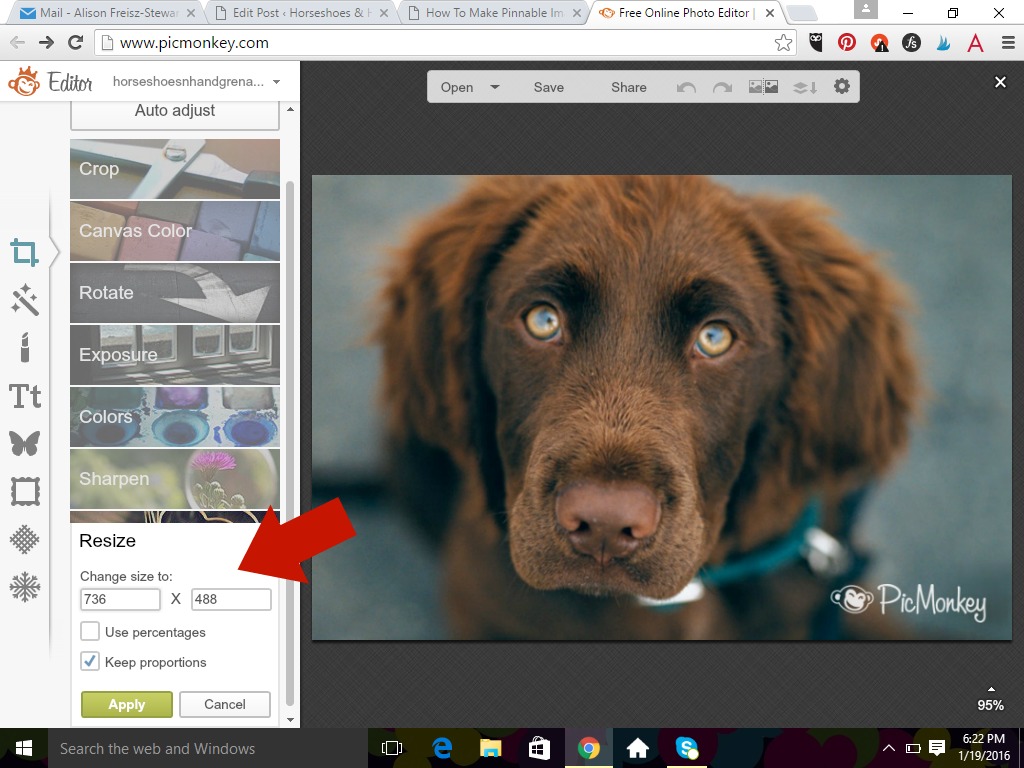
2. The first thing I do is re-size my photo based on what I’m creating it for. It’s been said that Pinterest likes photos 736 pixels wide & length will adjust automatically.
Other things you can do on this page include cropping your photo, maybe you have a toddler foot in the shot you want to take out, and you can adjust your exposures and sharpen your image as well. Now I’m no expert phototgrapher so I’m not even going to try to tell you what you should do with those settings and honestly, those are things you’ll want to play around with and find what works with each photo, and ultimately you’ll find a few edits that you do all the time, and you’ll whip through them no problem. For the sake of creating our pinnable image though, we’re going to pretend that you took the perfect shot so no exposure adjustments are needed. I mean just look at that cute pup – nothing could make him any cuter!
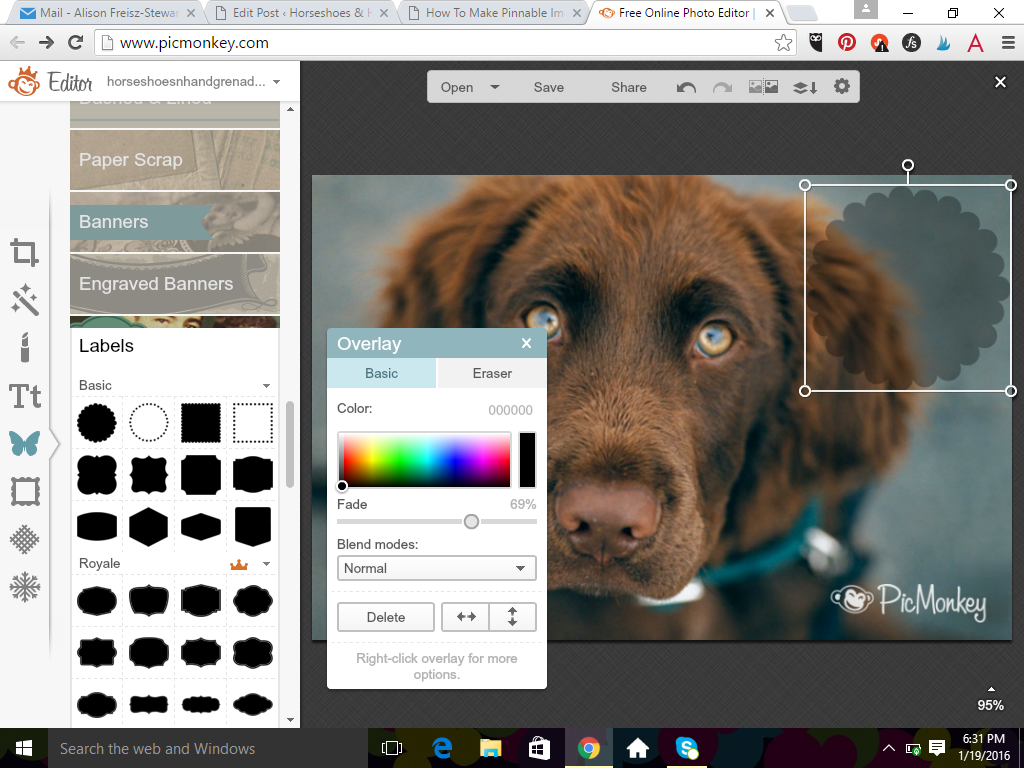
3. The next page I hit is overlays. Now there are a ton of things you can do here , but when creating my Pinterest image, I generally stick to the labels which is where I put my post title or text. There are several to choose from so just go with what you like and you can adjust the color scheme and the fade on that as well.
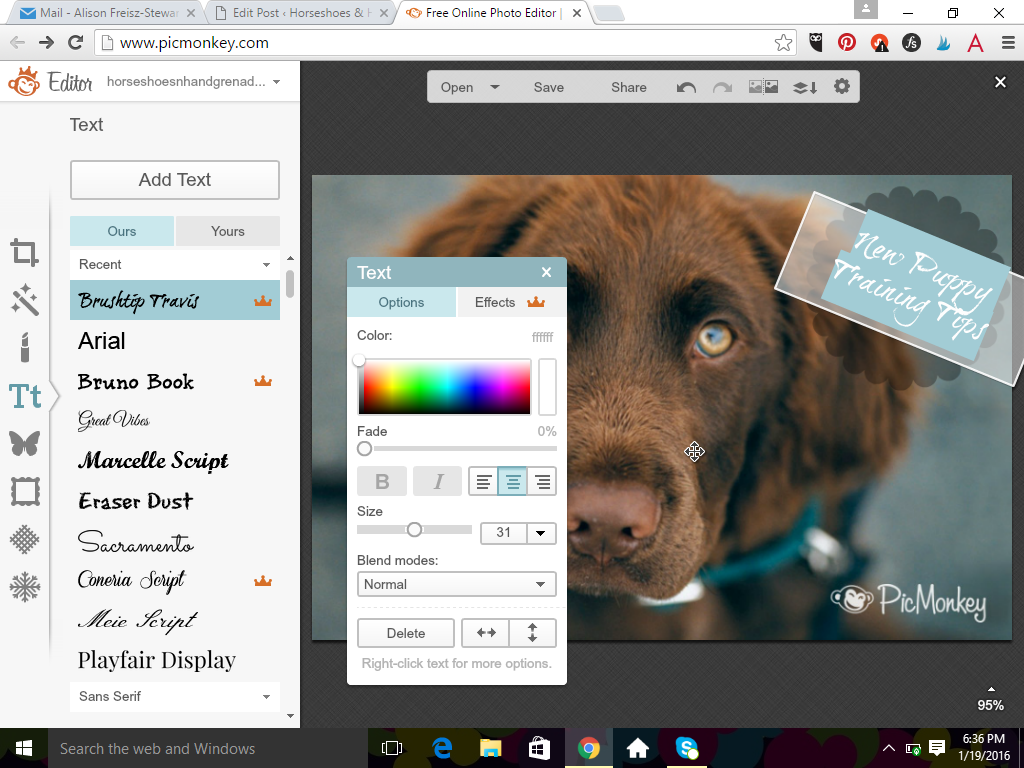
4. Once I’ve decided I like my label, my color and my placement I move to adding my text. Again, you’ll play around with this, font, color, placement in your label, until you find what you like. After a while you’ll find that you have a handful of faves that you go back to time and time again, this kind of becomes your “style” which is great because people begin to associate that with your brand, BUT don’t feel like it’s wrong if you don’t choose the exact same style every time.
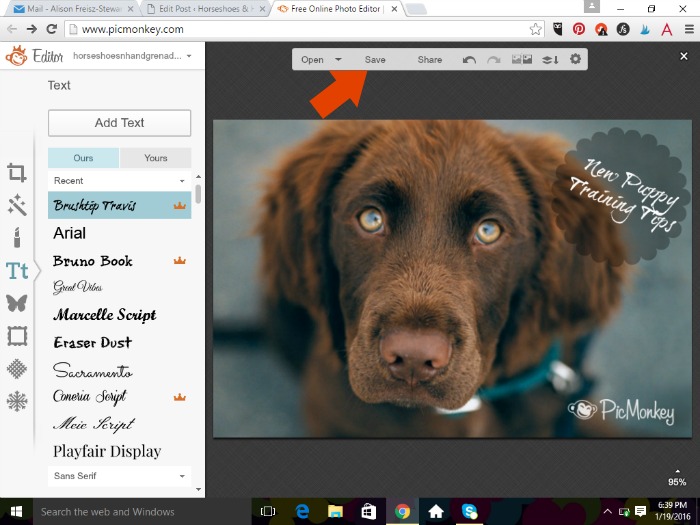
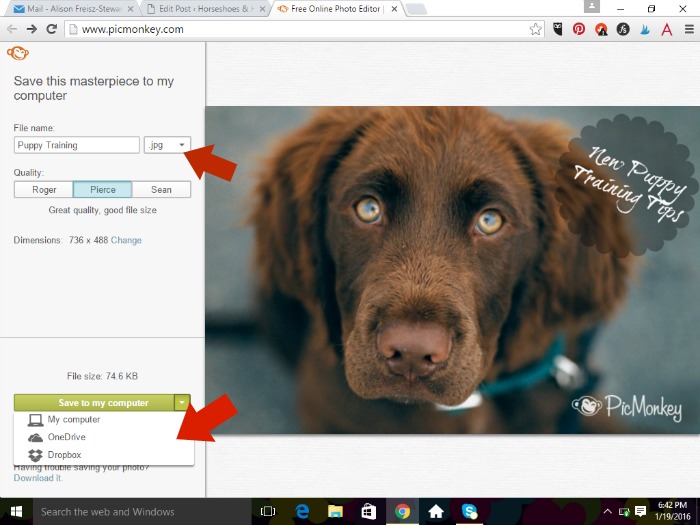
5. At this point, if you’re happy with the way your image looks, you’ve checked the spelling and don’t forget to put your watermark or URL on it, you can save it to your file storage of choice.
You can also choose to save as a .jpg or .png file depending on your needs.
Once saved you’re ready to add that gorgeous image to your post and or Pinterest!
Blogathon Challenge
Now that you have what you need to create a nice, pinnable image, your challenge is to create a new Pinterest worthy image using the free version of PicMonkey and add that to one of your posts (can be one already published if you want). Then pin that post using the new image you created and leave the link to your pin in the comments below so I know you’ve completed the challenge. I’ll be re-pinning everyone that participates as well so it’s a win-win!
Any questions, just let me know and happy blogging! Good Luck!







 Richetta Blackmon says
January 22, 2016 at 6:51 pmhttps://www.pinterest.com/pin/415105290634827770/
Thanks for this challenge! I love Pic Monkey!
 Moongirl says
January 23, 2016 at 5:11 pmOne comment or question. You should show us how to make the blog site watermark. I’ll work on this and get back to you
 Tanya @ Mom's Small Victories says
January 25, 2016 at 7:16 amI use Picmonkey all the time for my current design and pinnable images. I updated a post that did not already have a pinnable image. https://www.pinterest.com/pin/25332816632088090/
Thank you for the challenge, I love Picmonkey, I find it very easy to use!